|
| The Zoom Control switches between original, double or full screen mode.
Note: Not all screen sizing options and controls will be available at all times. Options will only be available if the presentation you are viewing supports them. | ||
|
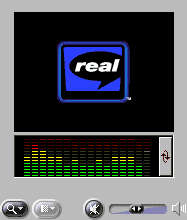
| Volume and Mute contols. Clicking Mute temporarily lowers the volume to zero. Clicking Mute again will restore sound
to its previous level. Draging the volume button along the slider to the right
to increase volume, or to the left to decrease it.
|
| Click to open the Video Controls.
|
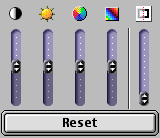
| The Video Controls do not work with every type of file. They will only be available if the clip
you are playing can be affected by the controls. They adjust, from left to
right, Contrast, Brightness, Color Level, Hue/Tint, and Sharpness.
|
| Contrast
| Adjusts the contrast, altering the degree of difference between the light and
dark shades in the clip.
| ||
| Brightness
| Adjust the brightness, how light the picture appears overall.
| ||
| Color Level
| Adjusts the color saturation of the picture, how brilliant the colors are.
| ||
| | Tint
| Adjusts the overall hue of the picture.
| |
| | Sharpness
| Adjusts the clarity of the edges in the picture.
|